
How do I create waste containers for disposal?
- Before you start
- The selectable materials must first be defined under Settings → Disposal.
- Where to find it
- Disposal → New waste container
- How to check the result
- The saved waste container appears immediately in the Disposal overview.
On this page
The Disposal section is where you manage all waste and disposal containers on your construction site. Every container gets a serial number and a standard material, so it is always clear which container is meant for which type of waste.
Quick answer
| Step | Description |
|---|---|
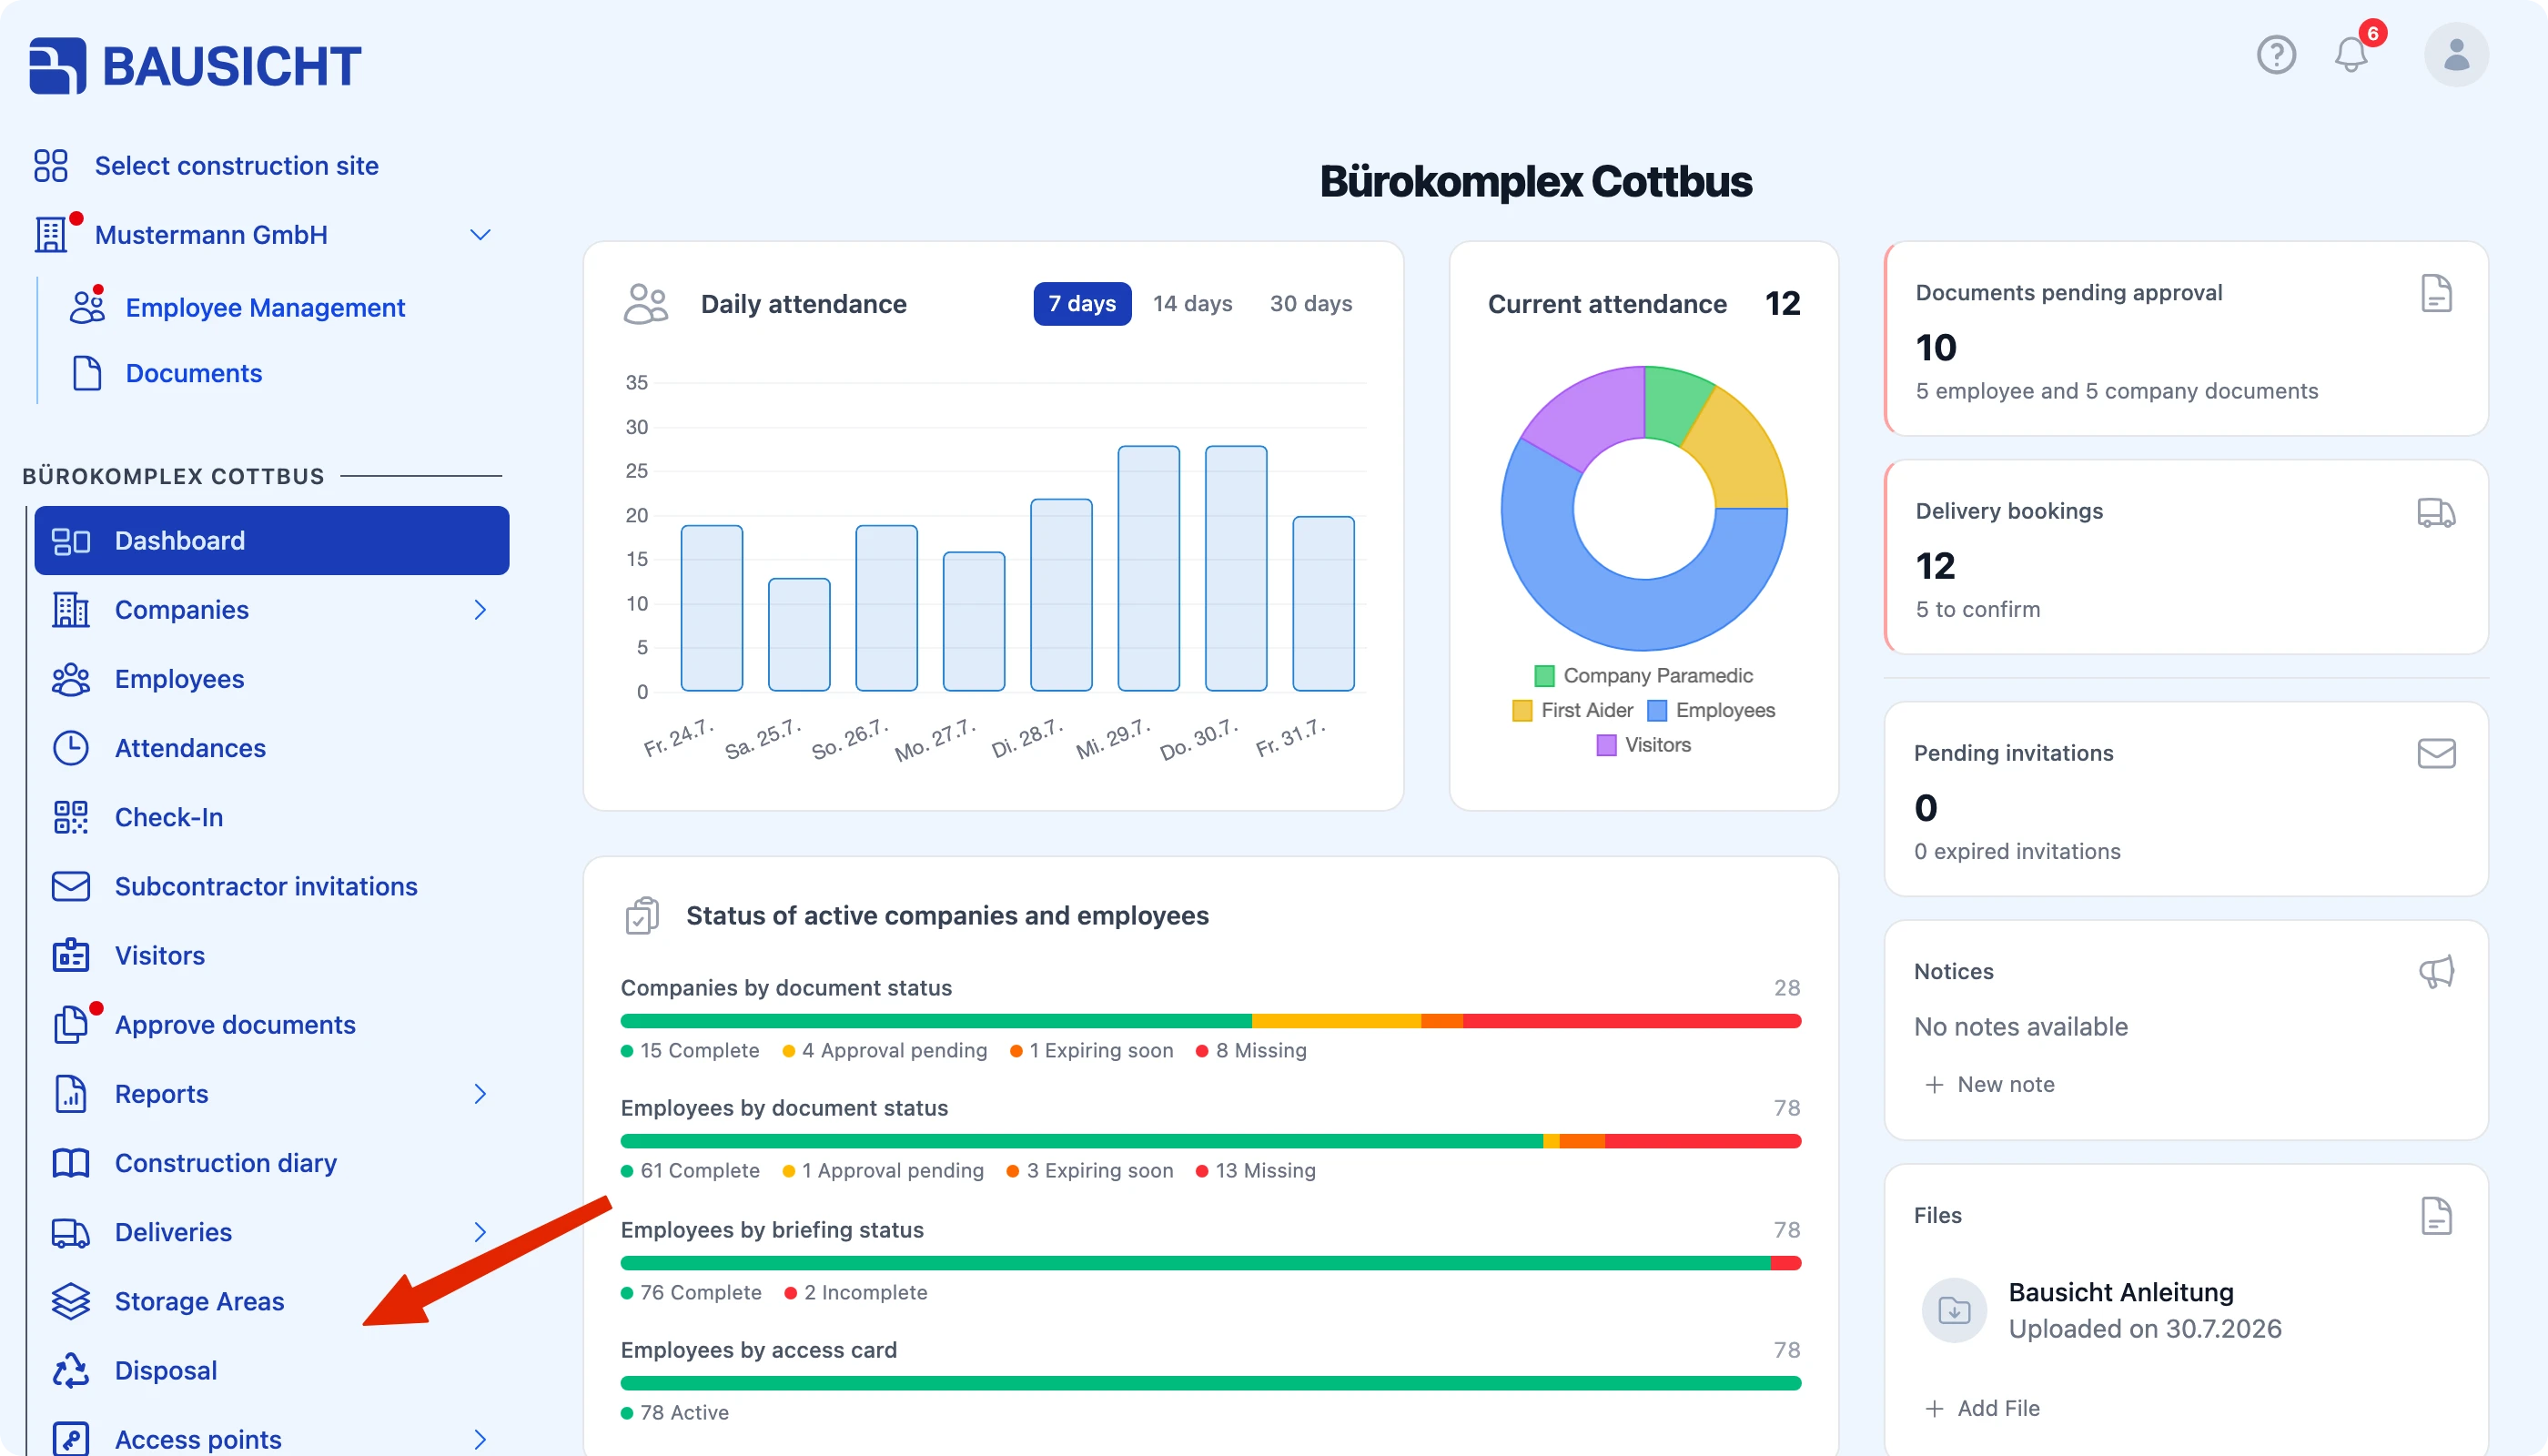
| 1 | In the left navigation, open Disposal |
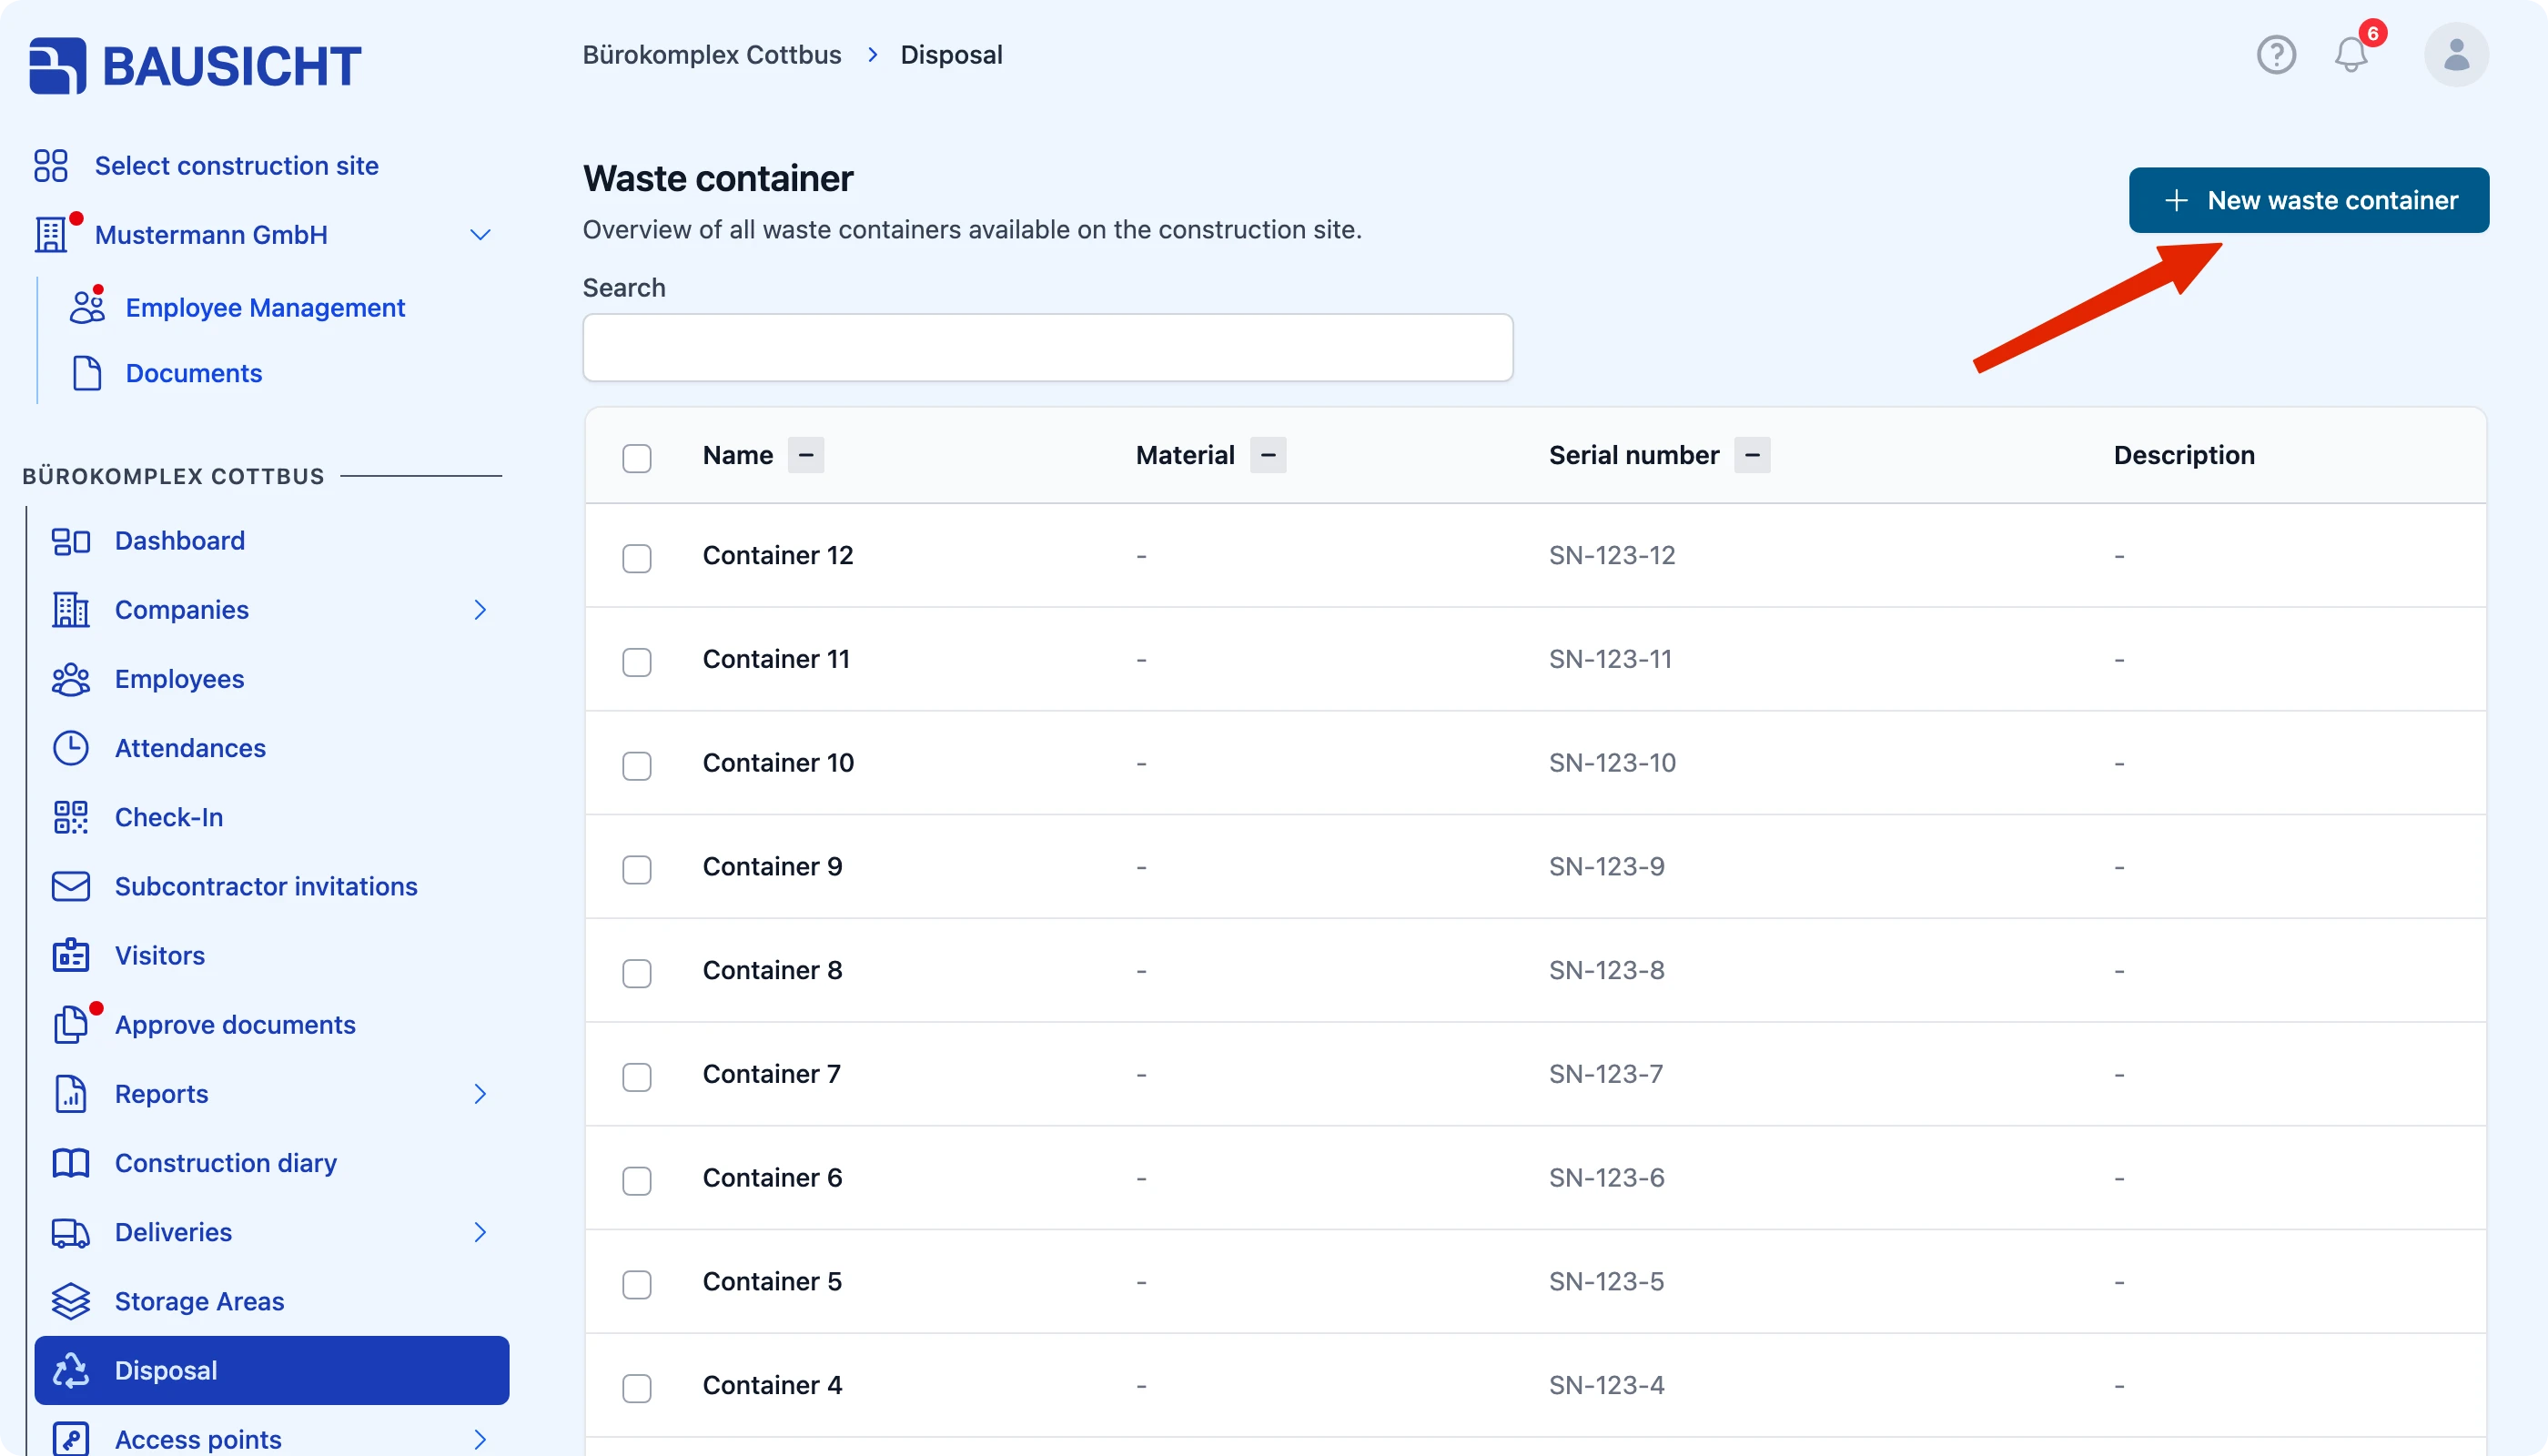
| 2 | Click New waste container at the top right |
| 3 | Enter Name, Serial number, Standard material and Description |
| 4 | Click Save |
Requirements
The selectable materials are defined in advance under Settings → Disposal.
Also read:
How do I maintain materials and AVV codes for disposal?
Step 1: Open “Disposal” in the left navigation
The overview lists all existing containers with Name, Material, Serial number and Description.
Step 2: Click “New waste container”
Step 3: Enter the container details
| Field | Meaning |
|---|---|
| Name (required) | Label of the container, for example „Container 12“ |
| Serial number | Number of the container, usually assigned by the disposal company |
| Standard material | Material that is normally disposed of in this container |
| Description | Optional addition, for example the location on site |
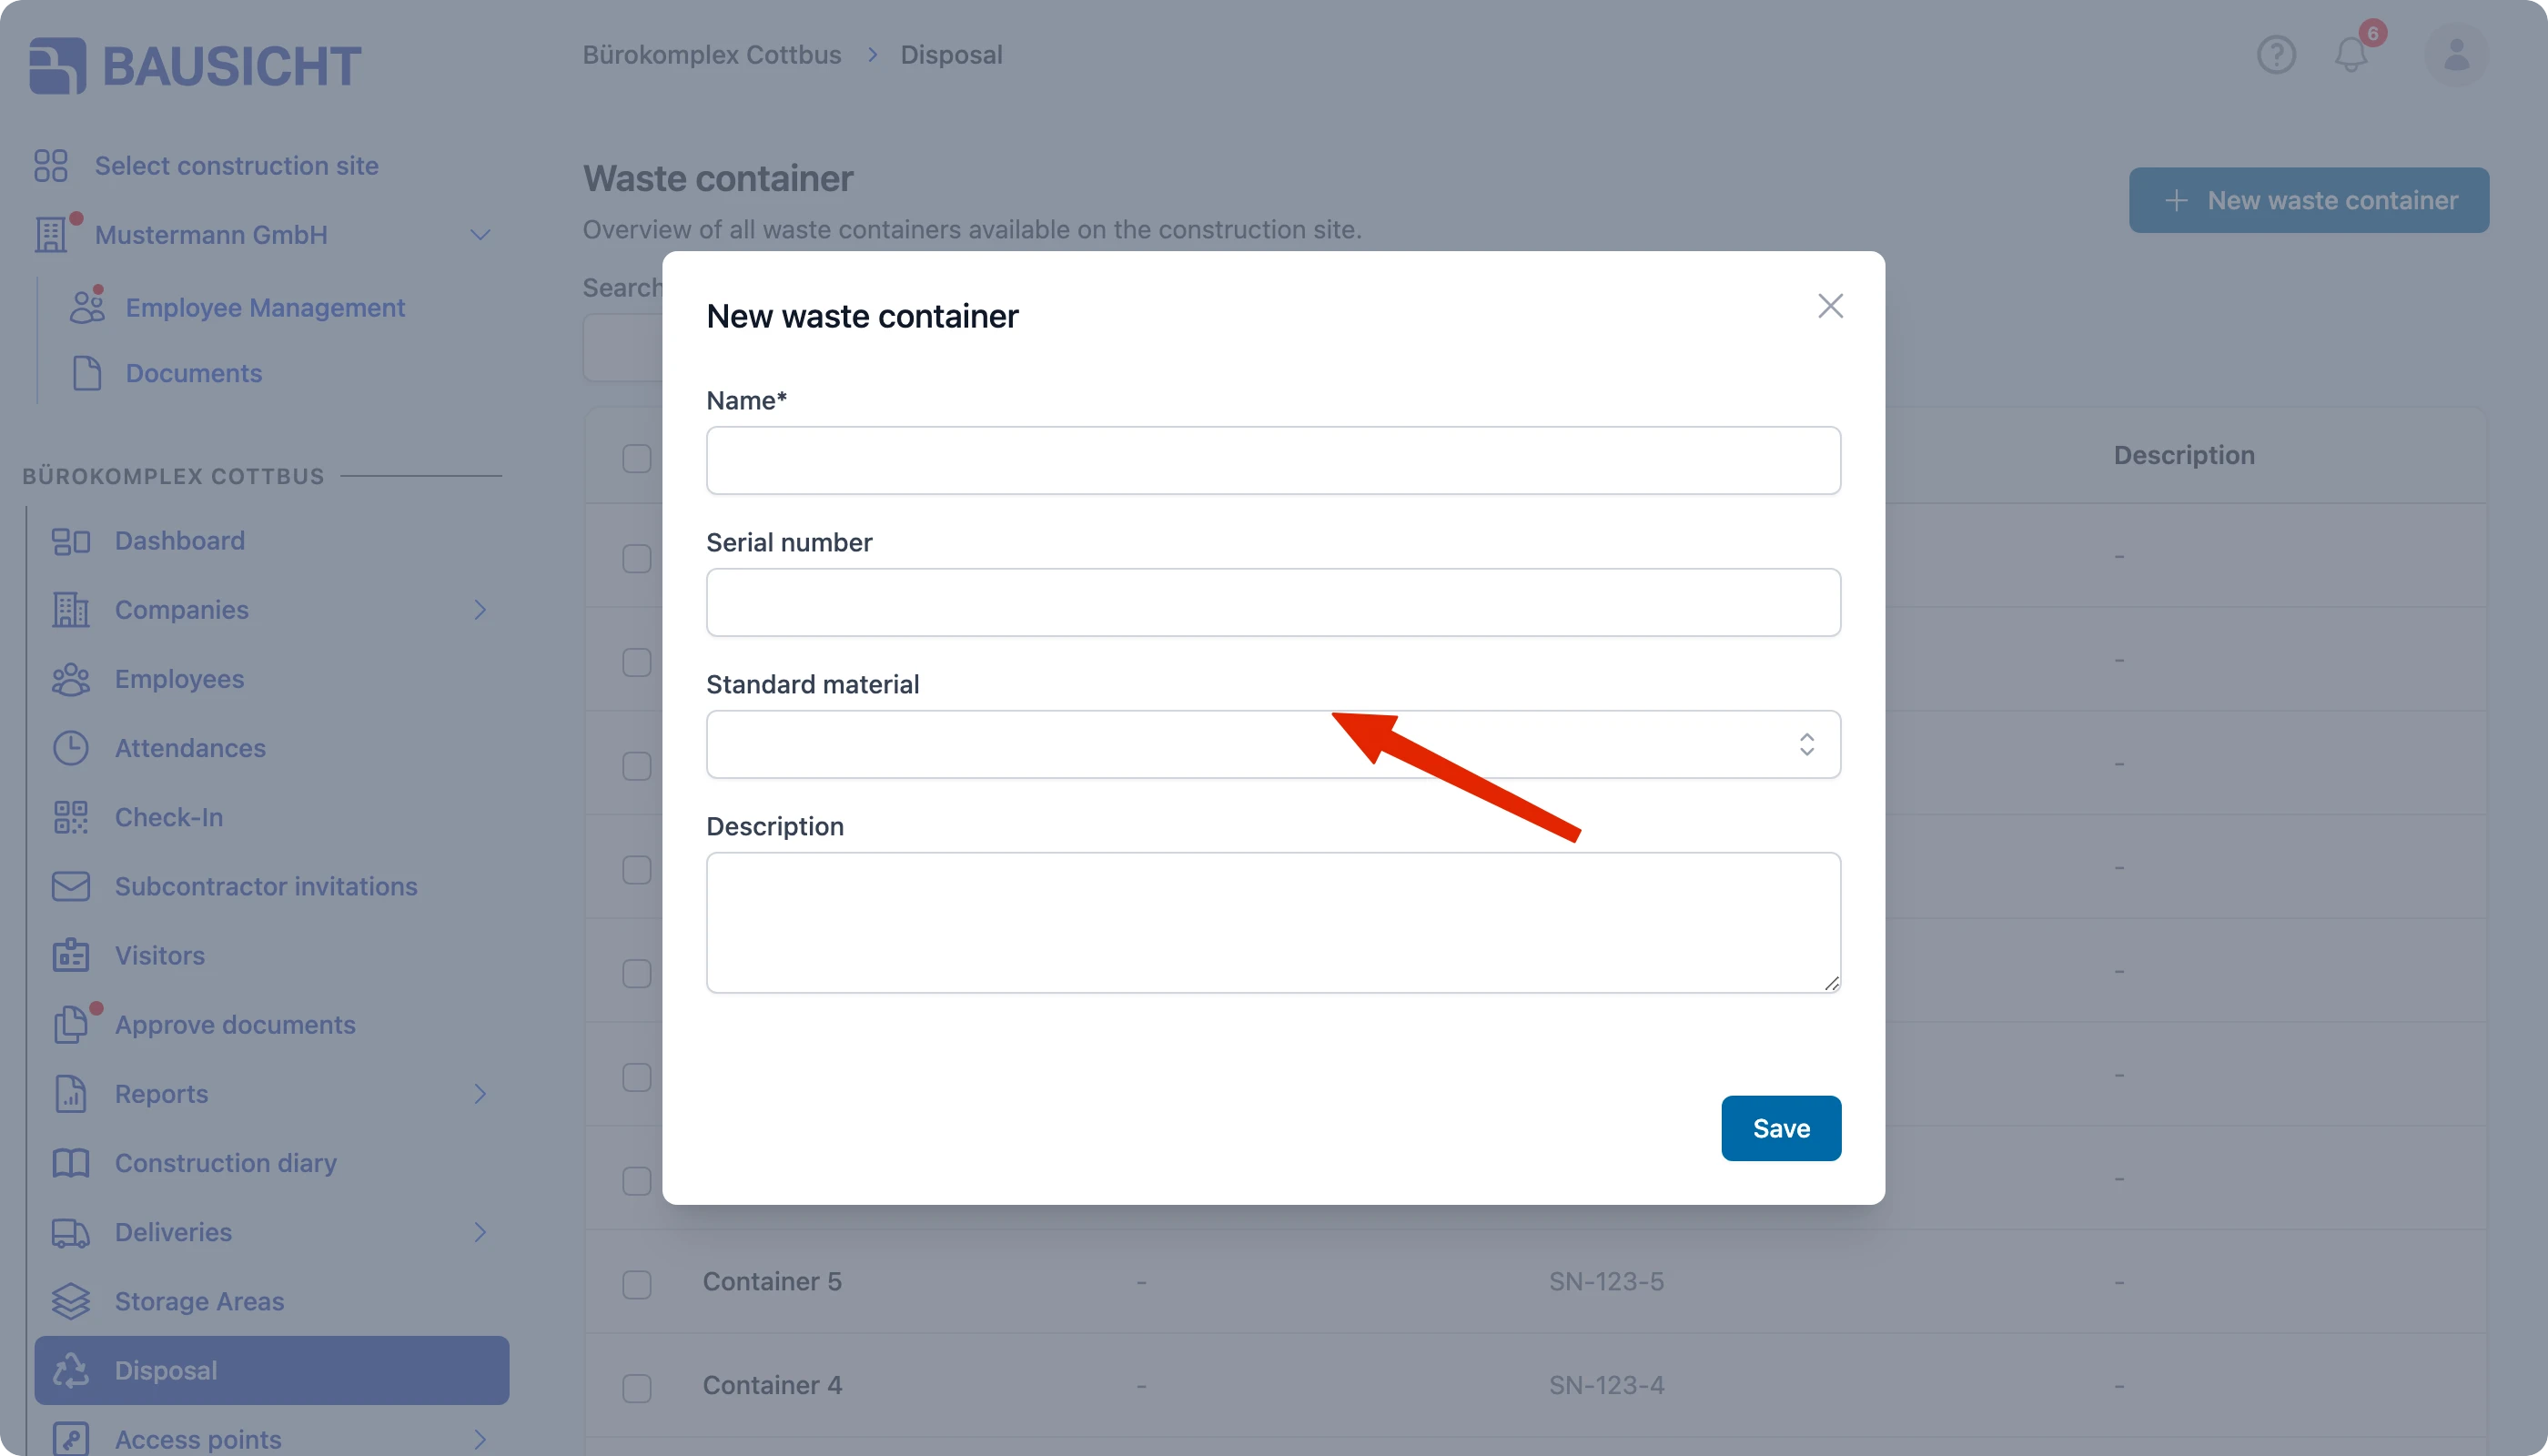
Then click Save. The container appears in the overview straight away.

Tip: A well-maintained Standard material speeds up documentation later on – the material is then already pre-filled during the disposal process.
Need further help?
If you need further assistance with disposal, our support team is happy to help.